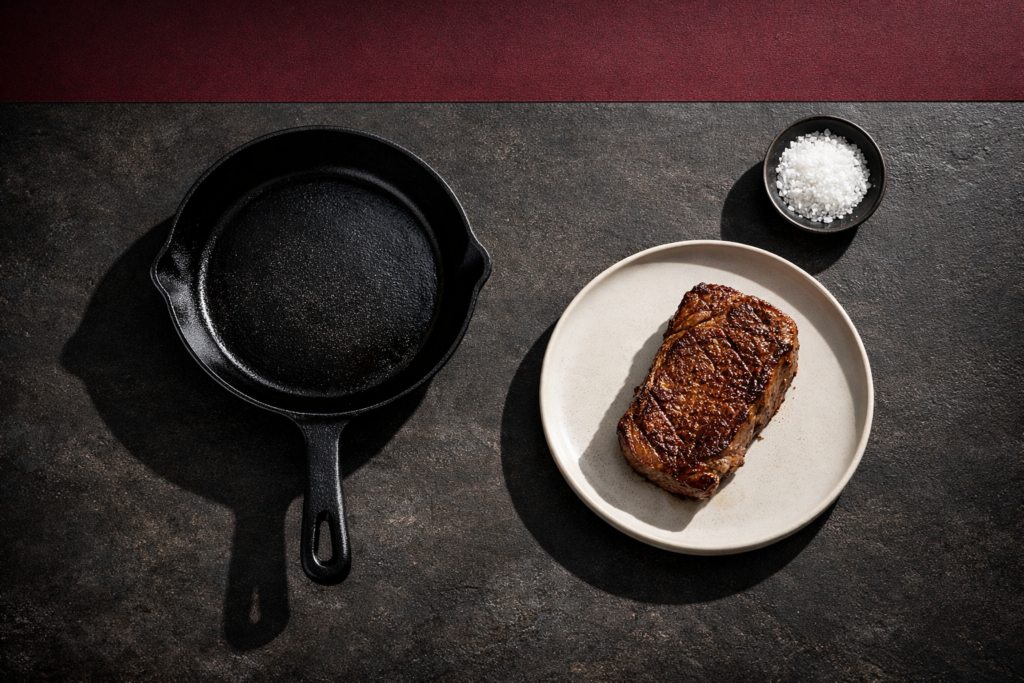
If you want to know how to sear meat, the short answer is this: dry the meat well, heat a heavy pan until very hot, add a suitable high-heat fat, then cook the meat without moving it until a deep brown crust forms. Good searing is less about complicated technique and more about moisture control, proper heat, and patience.
Searing does not “seal in” juices, but it does build flavor and texture through browning. Whether you are cooking steak, lamb chops, pork, chicken, or thicker pieces of fish, the same principles apply. Once you understand them, you can get better results with far less guesswork.
Why searing matters
Searing creates the browned surface that gives cooked meat its savory, roasted taste. This happens when heat transforms proteins and sugars on the surface of the food. In practical terms, that means more flavor, more aroma, and a more appealing texture.
A proper sear also improves contrast. A steak with a browned crust and a juicy center is more satisfying than one that is pale on the outside. The same goes for pork chops, duck breast, or a chicken thigh with crisp, browned skin.
That said, searing is only one part of cooking. A dark crust on the outside will not fix overcooked meat inside. The goal is to combine strong surface browning with the internal doneness you want.
How to sear meat: the core method
This method works for most cuts cooked in a pan. You can adjust timing based on thickness and type of meat, but the order stays much the same.
- Bring the meat out briefly. Let it sit at room temperature for about 15 to 30 minutes if it is a small or medium cut. This is optional, but it can help it cook more evenly. Do not leave raw meat out for long periods. Follow local food safety guidance, especially in warm kitchens.
- Dry it thoroughly. Use paper towels or a clean kitchen towel reserved for food prep. Surface moisture creates steam, and steam prevents browning.
- Season. Add salt just before searing, or farther in advance if you have time. Pepper can be added before or after; some cooks prefer after, as finely ground pepper can scorch in a very hot pan.
- Preheat the pan. Set a heavy pan over medium-high to high heat until it is properly hot. The exact setting depends on your stove and pan. The pan should be hot enough that the meat sizzles immediately on contact.
- Add a high-heat fat. Use a small amount of oil or another cooking fat with a relatively high smoke point. Swirl to coat the surface lightly.
- Lay the meat in the pan away from you. This helps reduce the chance of hot fat splashing toward your body.
- Do not move it too soon. Leave it in place until a browned crust forms naturally. If it sticks at first, wait. Meat often releases more easily once properly seared.
- Turn and finish cooking. Flip once the first side is deeply browned, then cook the second side. Depending on thickness, you may finish on lower heat, in an oven, or by turning more frequently after the initial crust forms.
- Rest before slicing. Let the meat rest for a few minutes so the juices can redistribute. Smaller cuts need less time; larger roasts need more.
Choose the right pan and fat
Best pans for searing
A heavy pan holds heat better when cold meat hits the surface. That matters because a thin pan can lose heat quickly, causing steaming instead of browning.
- Cast iron: Excellent heat retention and strong browning. Very good for steaks, chops, and chicken pieces.
- Carbon steel: Similar to cast iron, often lighter and very responsive once hot.
- Stainless steel: Also a strong choice, especially for building pan drippings for sauces.
Nonstick pans are convenient for delicate foods, but they are not ideal for very high-heat searing. Some nonstick coatings can degrade if overheated. Check the manufacturer’s guidance for your cookware.
Best fats for searing
Use a fat that tolerates relatively high heat. Neutral oils are common because they do not compete with the flavor of the meat. Clarified butter can also work well. Whole butter adds great flavor, but its milk solids can burn quickly, so it is better added later for basting rather than as the only fat at the start.
Use just enough fat to coat the pan lightly. Too much can make the sear greasy rather than crisp.
Prepare the meat for better browning
Dryness is critical
This is the step many home cooks skip. Wet meat does not brown well because the pan must first drive off that surface water. Until that happens, the surface temperature stays lower and the meat steams.
Pat the meat dry on all sides. If the cut is skin-on, dry the skin especially well.
Salt timing
There are two easy approaches:
- Salt just before cooking: Simple and reliable.
- Salt well in advance: If you salt earlier and leave the meat uncovered in the refrigerator, the surface can dry more effectively and season more evenly.
What you want to avoid is salting, then leaving the meat sitting briefly while moisture beads on the surface. If that happens, pat it dry again before it hits the pan.
Thickness matters
Thin cuts can brown fast but also overcook fast. Thick cuts are easier to sear deeply while keeping the center less done. For very thick steaks or chops, it often helps to sear first and finish with gentler heat, such as in an oven at 180°C to 200°C (350°F to 400°F), depending on the cut and your desired doneness.
Heat control: hot enough, not burnt
A hot pan is essential, but “very hot” does not mean uncontrolled smoke and burnt oil. The best sear comes from steady, confident heat.
How to tell the pan is ready
You should hear a strong sizzle the moment the meat touches the pan. The oil should look fluid and shimmer slightly. If the meat goes in quietly, the pan is not hot enough. If the oil smokes heavily at once, the heat may be too high for that fat or that pan.
Avoid overcrowding
If you put too much meat in the pan at once, the temperature drops and moisture gets trapped. Cook in batches if needed. Leaving space around each piece allows steam to escape and encourages browning.
Press gently, but do not fuss
For chops, steaks, or chicken skin, a brief gentle press can help the surface make full contact with the pan. After that, leave it alone. Constant moving interrupts crust formation.
Searing different types of meat
Beef and lamb
Steaks, medallions, and lamb chops sear especially well because they are often cooked to medium or less, giving enough time to build a crust without drying out the center. Start with a very dry surface and a hot pan. For thicker cuts, sear all major sides, including the fat edge if present.
Pork
Pork chops, tenderloin medallions, and pork shoulder slices all benefit from searing. Because pork is often served more fully cooked than beef, watch the internal temperature closely so the exterior does not darken too far before the center is done.
Chicken
Skin-on chicken thighs and breasts are excellent candidates for searing. Start skin-side down and give the skin time to render and crisp. With boneless pieces, lower the heat if the surface browns too quickly. Always cook chicken to a safe internal temperature according to current local food safety guidance.
Duck
Duck breast is a special case because much of the cooking involves rendering fat. Start in a cooler pan than you would for steak, especially if the skin layer is thick. This helps the fat melt gradually while the skin browns and crisps.
Fish and other proteins
Although this guide is about meat, the same searing logic works for thicker fish fillets or seafood: dry surface, proper heat, and enough space. Delicate fish may be better in stainless steel or nonstick, depending on the finish you want and the heat limits of the pan.
Should you baste, butter, or finish in the oven?
Basting
Once the main crust has formed, you can reduce the heat slightly and add butter, garlic, or herbs to the pan. Tilt the pan carefully and spoon the foaming butter over the meat. This adds flavor and encourages even cooking.
Safety note: Hot fat can splatter badly, especially if the meat is damp. Keep children away from the stove, use long utensils, and never add wet ingredients carelessly to hot oil.
Oven finishing
For thick cuts, pan-searing followed by oven cooking is often the easiest route to a good result. Sear both sides, then transfer the pan to the oven if the cookware is oven-safe. Always check the pan handle material first. Some handles get dangerously hot or are not suitable for oven use.
Reverse sear
For thick steaks, a reverse sear can be useful. You cook the meat gently first, often in the oven, then finish with a quick sear in a very hot pan. This can give a more even interior with less risk of a burnt exterior. It is not necessary for every cut, but it is worth knowing.
Common mistakes that ruin a sear
- Putting wet meat in the pan: This causes steaming.
- Using a cold or barely warm pan: The crust forms poorly and slowly.
- Overcrowding: Too much food lowers pan temperature and traps steam.
- Turning too soon: The meat may tear or stick because the crust has not formed.
- Using low-heat oil for very high heat: This can lead to burnt flavors and excess smoke.
- Trying to sear and fully cook a very thick cut over fierce heat alone: The outside may burn before the center is ready.
- Skipping the rest: Slicing immediately can let more juices run out onto the board.
Safety and food handling
Searing involves high heat, hot metal, and often splattering fat, so a few precautions matter.
- Use dry tools and dry ingredients around hot oil to reduce splatter.
- Turn on ventilation or open windows if possible, especially with cast iron or high-heat cooking.
- Keep pan handles turned inward so they cannot be knocked accidentally.
- Do not leave hot oil unattended. If oil smokes heavily or you suspect it may ignite, turn off the heat if safe to do so and never throw water on an oil fire.
- Use a clean plate for cooked meat. Do not place it back on the plate that held raw meat unless the plate has been washed.
- Check safe internal temperatures for the specific meat you are cooking, based on current local food safety guidance.
How to tell when the sear is right
A good sear is deep brown, not gray and not blackened all over. The surface should look crisp and appetizing, with visible caramelization. If you see pale patches, the pan may not have had full contact with the meat, or the surface may have been too wet.
The meat should also release from the pan with little resistance once the crust forms. If it is stubbornly stuck, give it another 20 to 30 seconds and try again.
Frequently asked questions
Do I need oil if the meat is fatty?
Often, yes, but only a small amount. Even fatty cuts benefit from a thin layer of oil to help heat transfer at the start. Some meats, like duck breast, will render enough fat quickly once cooking begins.
Should I sear meat before or after oven cooking?
Either can work. Traditional searing starts in the pan and finishes in the oven. A reverse sear cooks gently first, then browns the exterior at the end. Thick cuts often do well with reverse searing.
Why does my meat stick to the pan?
Usually because the crust has not formed yet, the pan was not hot enough, or the meat surface was too wet. With stainless steel and cast iron, sticking often decreases once browning is established.
Can I sear frozen meat?
It is better to thaw meat safely first for more even cooking and better browning. A frozen surface releases moisture as it heats, which works against a good crust.
Is a darker sear always better?
No. Deep brown is ideal. Burnt or heavily blackened spots can taste bitter and hide the natural flavor of the meat.
Conclusion
Learning how to sear meat comes down to a few reliable habits: dry the surface, preheat the pan properly, use the right fat, avoid crowding, and give the crust time to form before turning. Once you get those basics right, searing becomes simple, repeatable, and one of the most useful cooking skills you can build.


